
My day-to-day involves a lot working in / with Azure DevOps. I’ve setup a fair few build & release pipelines for Web Apps and thought I’d give creating one for a Unity WebGL build a go.
Note: This is not a perfect guide but more of an insight into how I did it and my thoughts along the way. If you would like more details please tweet me or comment on the reddit post.
Planning
It’s always good to start with a plan, even if it’s just a standard configuration. My plan is to create two pipelines, that perform the following steps:
- Build Pipeline
- Grab the MineColony repo from GitHub
- Run tests via the command line
- Build for WebGL via the command line
- Drop the output of the build for Azure DevOps to pickup
- Release Pipeline
- Pull down the drop for the selected build
- FTP all the build files up to my web server
Configuring the Build Pipeline
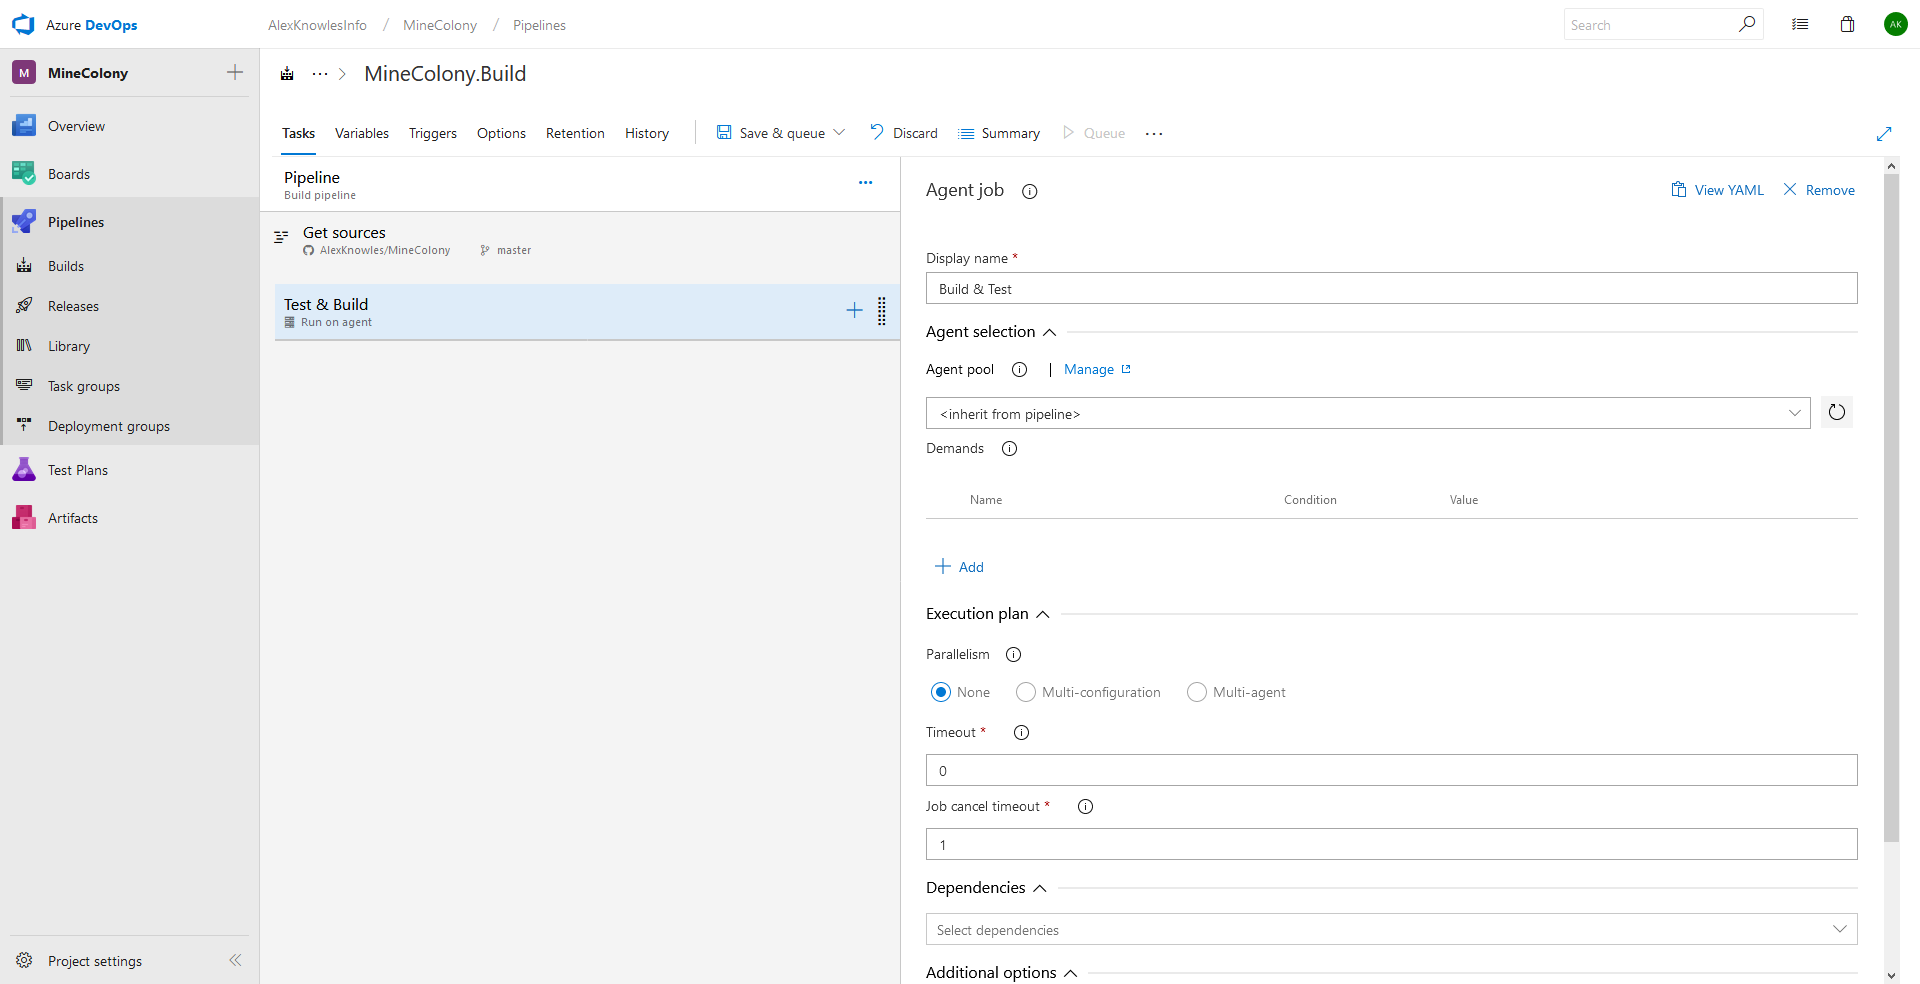
In Azure DevOps I created a basic pipeline via the designer, called it “MineColony.Build” and set it to use the “Hosted VS2017” Agent Pool as the pool information says it supports Unity3D (or at least game development with it). If the hosted agent doesn’t work, then I’ll need to create my own agent and host it somewhere that has Unity3D installed. I’ve also hooked up my GitHub repo using the master branch as the default branch to trigger a build.

This build pipeline is going to be pretty simple so we only need a single agent job. I’ve renamed it “Test & Build”
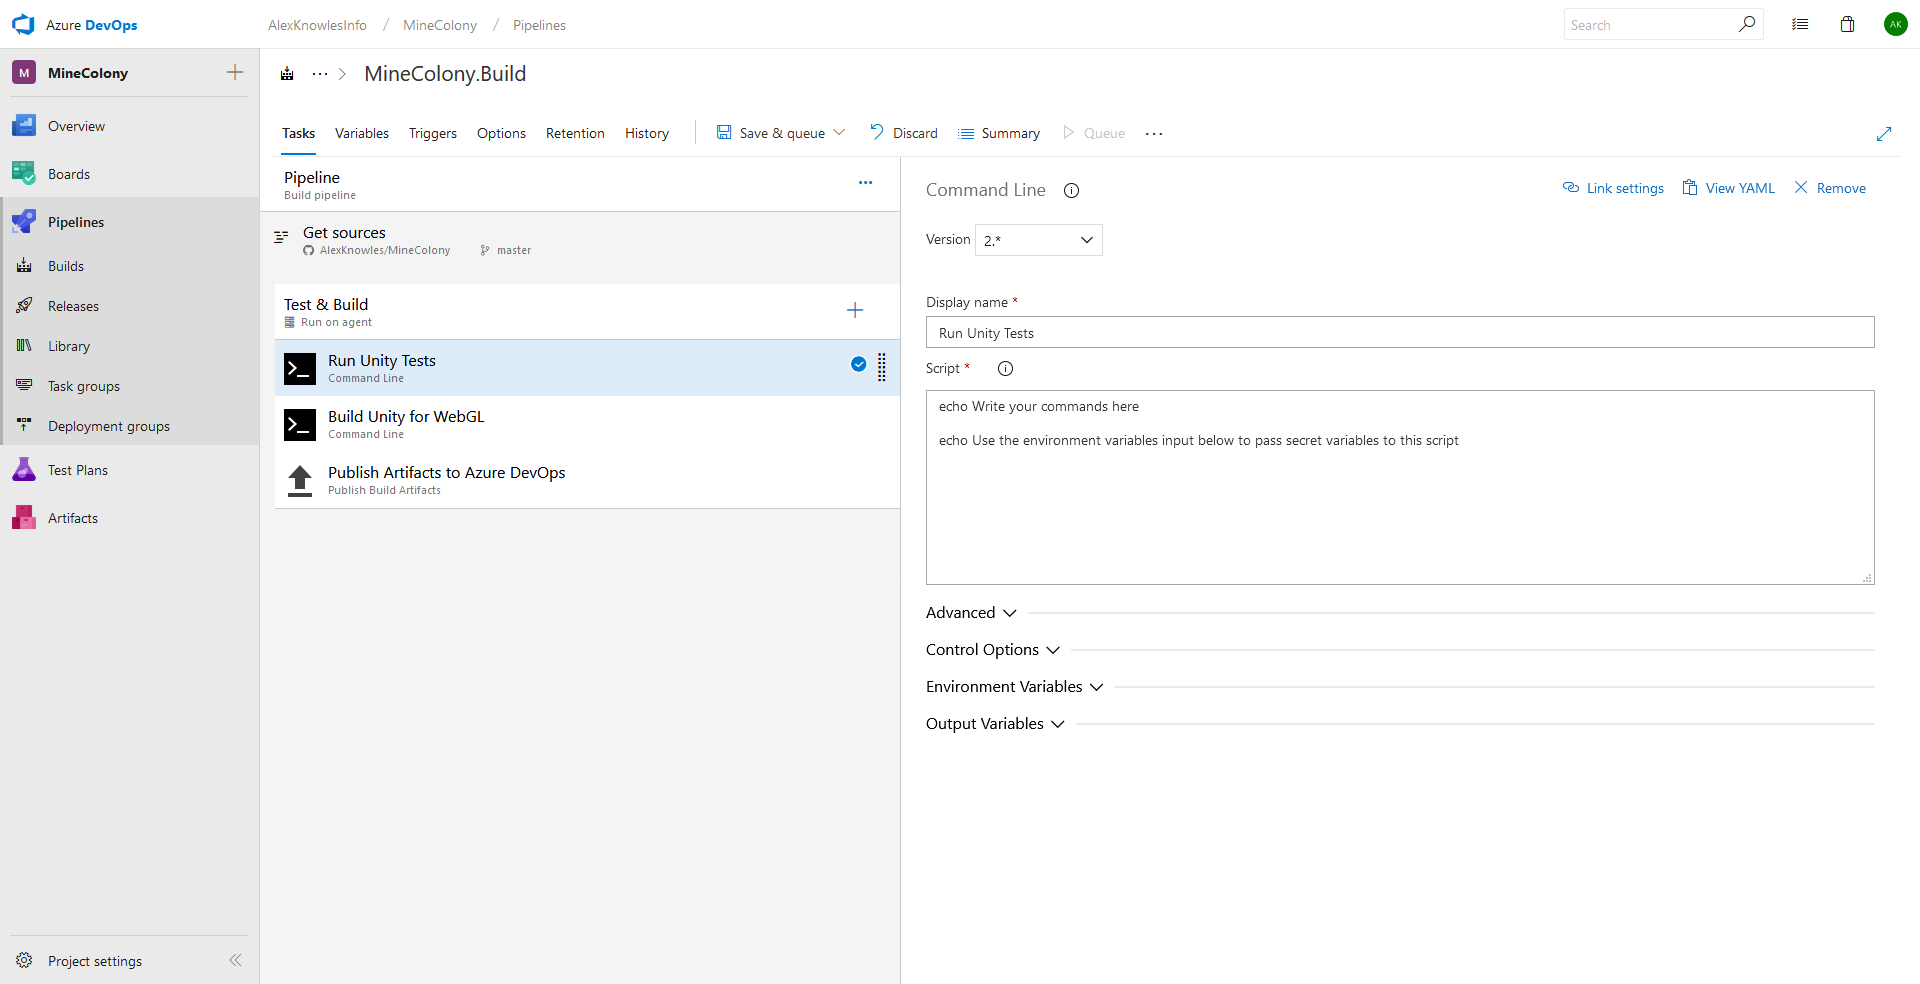
Next up is adding in the steps we planned. The first to grab the repo is already done so we only need to add two command line tasks and a single drop task to upload everything to Azure DevOps. I’ve renamed these to better describe what they’re for.
I’ve got a bit stuck with running tests outside of the editor and started digging into Unity’s command line arguments to figure it out. Whilst looking at this, and trying to get them to run, I realised that Unity only seem to offer support for Editor test where as I currently only have Playmode test. Some more digging lead me to Unity documentation about the Playmode Test Framework which has a little section at the bottom on how to run them from the command line. Great, now I have this knowledge I’m going to splits the test task in two, one for Editor tests and the other for Playmode tests.

From reading the documentation, I pulled together the commands below which got my test running locally.
cd "C:\Program Files\Unity\Hub\Editor\2018.3.0f2\Editor\" start /WAIT Unity.exe -batchmode -runTests -testPlatform playmode -projectPath "C:\Git\MineColony" -testResults "C:\BuildLogs\Results.xml"First bit is straightforward, we just need to change directory to where the install of Unity is. The command for running the test is a little bit more complicated so I’ll break it down.
- start /WAIT Unity.exe
- Pretty standard, run Unity.exe and wait for the process to complete before updating the command line
- –batchmode
- Set Unity to run in the background without loading a GUI
- -runTests
- Tell Unity we only want to run tests
- -testPlatform playmode
- Set the platform we want to test, so just playmode for now. Other option can be found here
- -projectPath “C:\Git\MineColony”
- The location of the Unity project
- -testResults “C:\BuildLogs\Results.xml”
- The location we want to put the test results
Moving this code into the build pipeline should be as simple as just changing the –projectPath and -testResults to use predefined build variables. Specifically, changing the project path to $(Build.Repository.LocalPath) and test results to $(Agent.BuildDirectory)\Results.xml

Now to give it a run! And as expected, it failed to find the location.
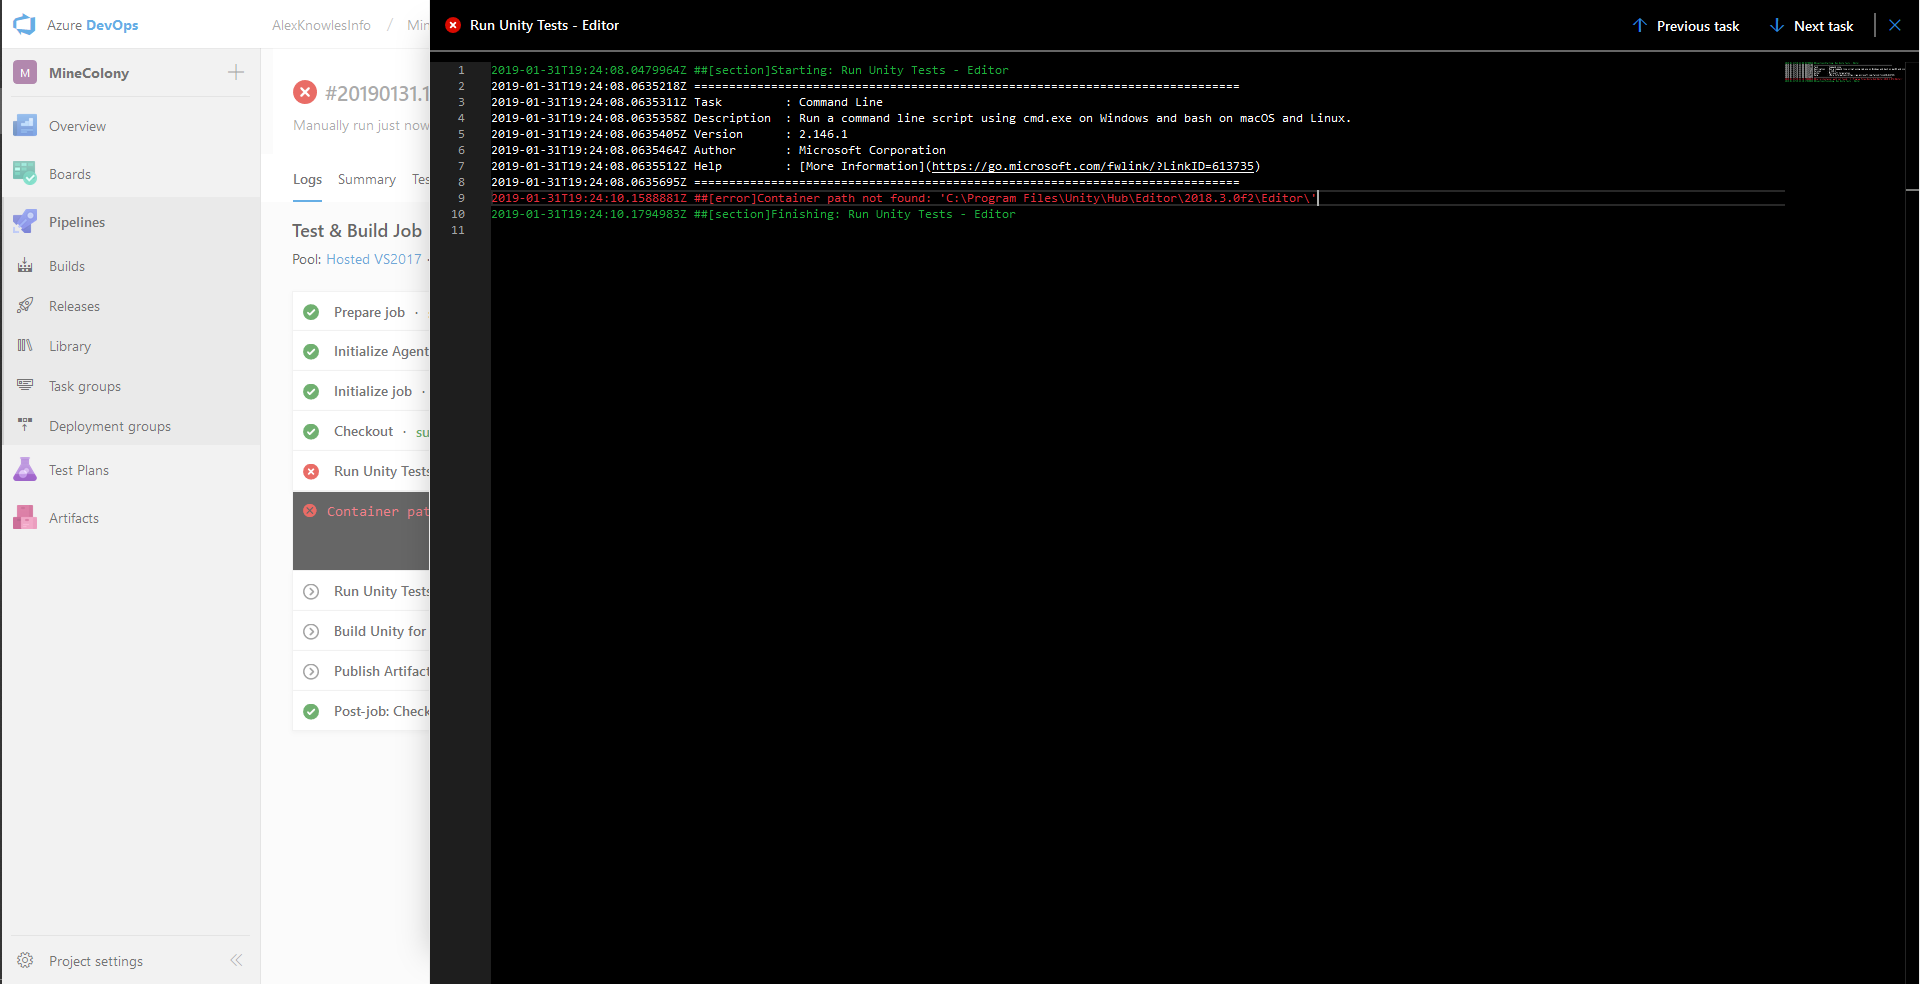
After paying around with it for awhile, I’ve come to the conclusion that the hosted agent doesn’t actually have Unity installed (I knew it was too good to be true) so I must setup a custom agent. As I’m a cheap ass and not ready to commit 100% to CI/CD, I’m just going to install a build agent on my local machine. I’m not going into detail how to do this as Microsoft cover it here.
And woop it runs! The only problem is the test results didn’t go into artifacts folder. This was just my mistake, I should have used $(Build.ArtifactStagingDirectory) instead of $(Agent.BuildDirectory)
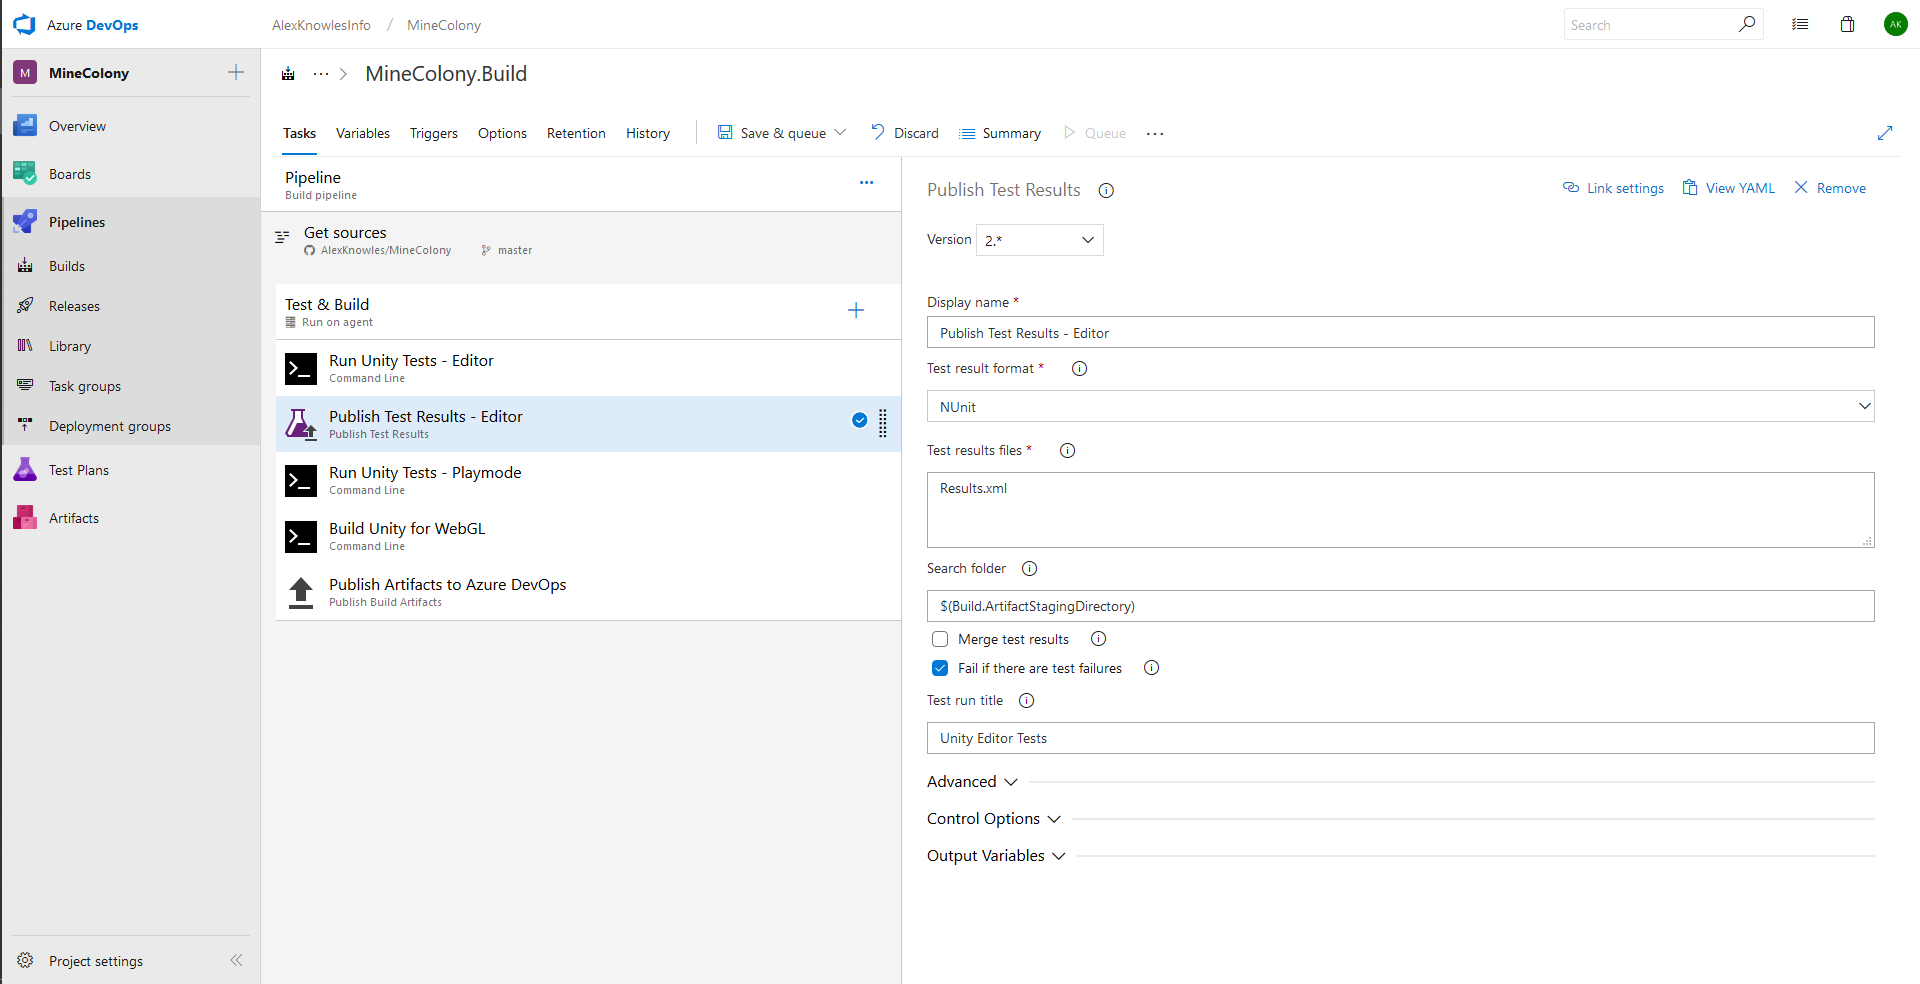
The tests run but we have no idea how many ran and if they were successful. From looking around online I need another step to collect test results (the results.xml file) and feed it back to Azure DevOps. As Unity’s testing tool are build on NUnit we can just grab a standard “Publish Test Results” step and point it to our test results.
Trigger a build and now the tests get picked up! Next to test if a test failure causes the build to fail.

I did have some issues with the test failures as the step seems to fail with an error code 2 (no idea what it is, and it wasn’t happening when I tested locally). I’ve just set the step to continue on error so we can publish the result and understand why our tests have failed.
Next up is running Playmode test. As soon a started this I just noticed I may put the wrong command into the editor test step. We’re going to need to clean this up anyway so it’s not a problem.
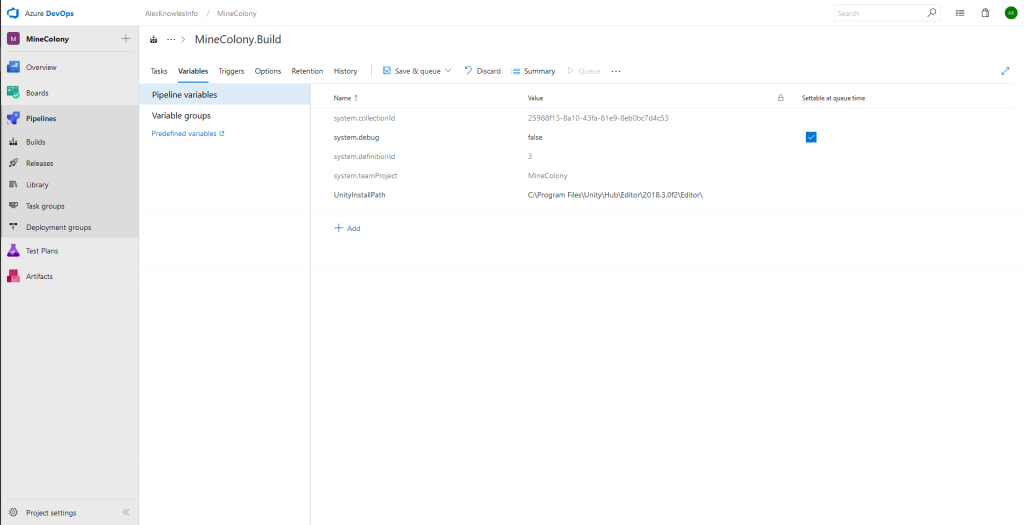
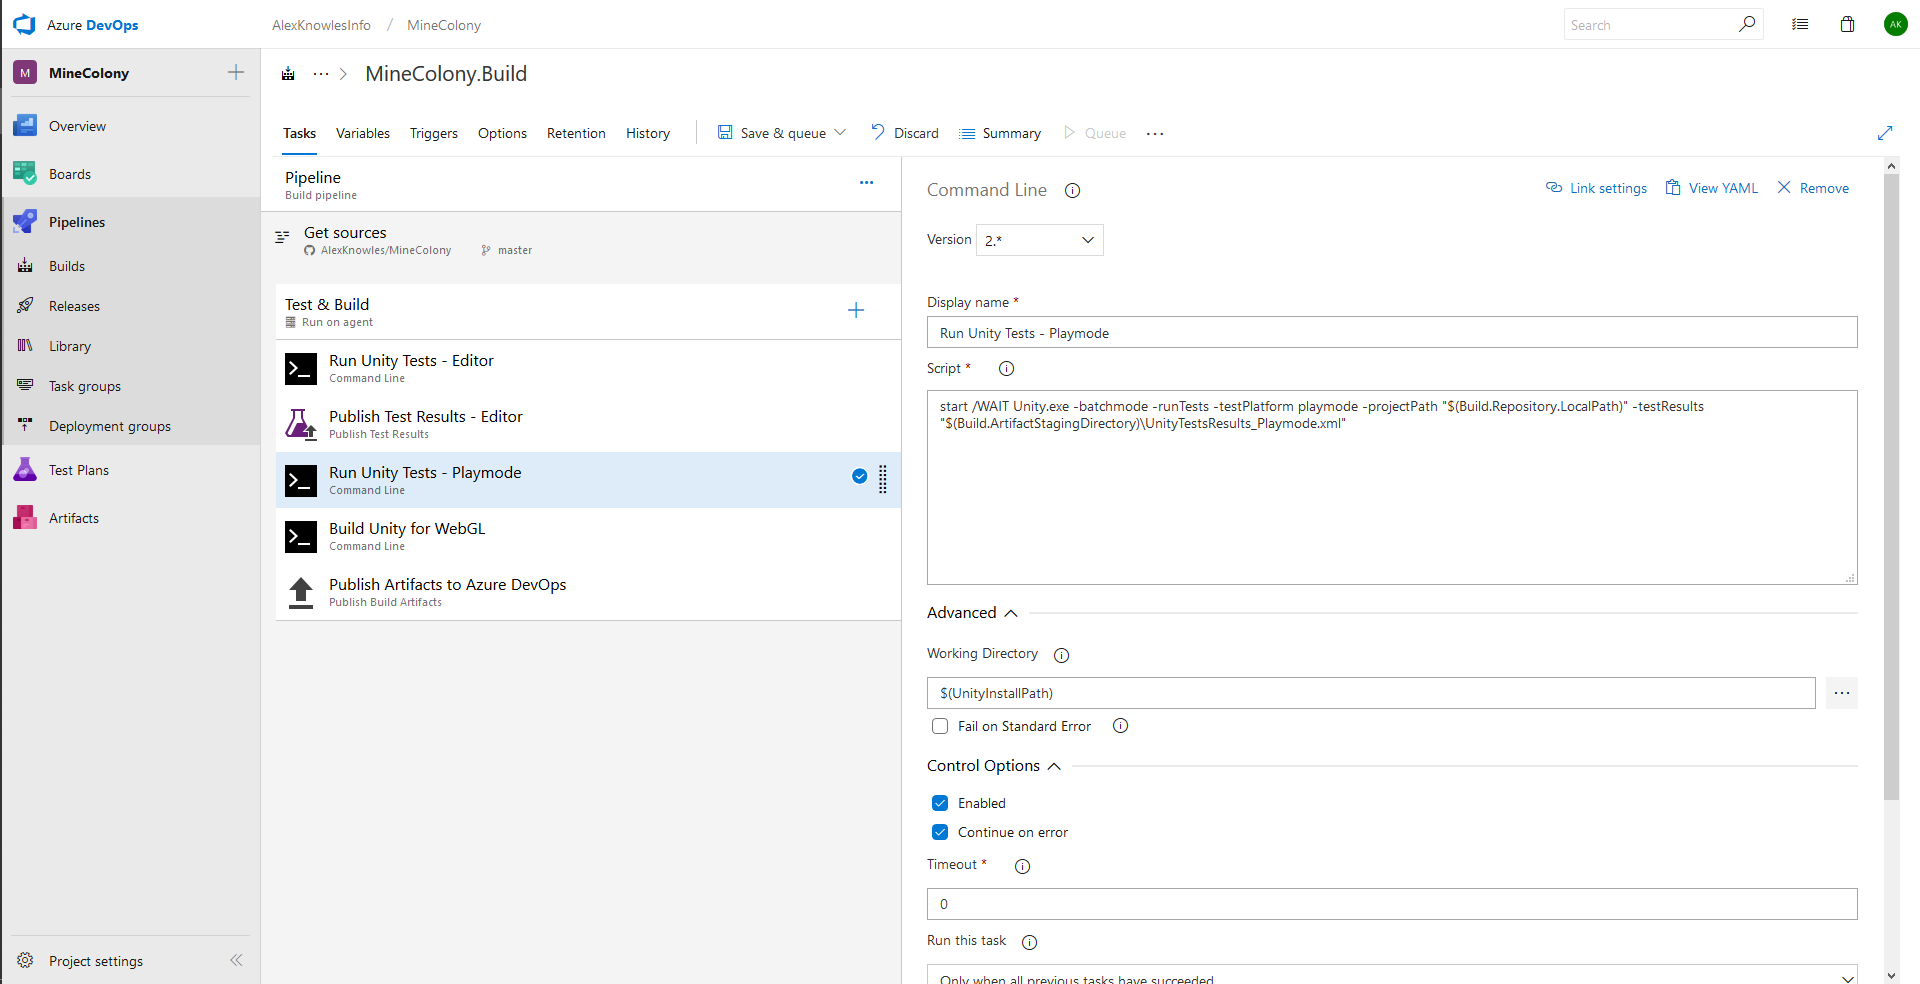
The two test steps are going to be pretty similar. Frist thing to do is minimize duplication by pulling out the path to Unity into a pipeline variable. We should also set it as the working path rather than using a “CD” command (Basically the same thing, just a little cleaner). I’m also going to change the name of the test result file as it’s not very descriptive.

Setting up the playmode tests is pretty much just a copypasta of the editor tests with a change to the -testPlatform.
Before we run the build, to ensure our changes have worked, I’m going to move and rename the Publish Test Results task. Having two results collectors just seems unnecessary as we can wildcard the xml files it looks for.

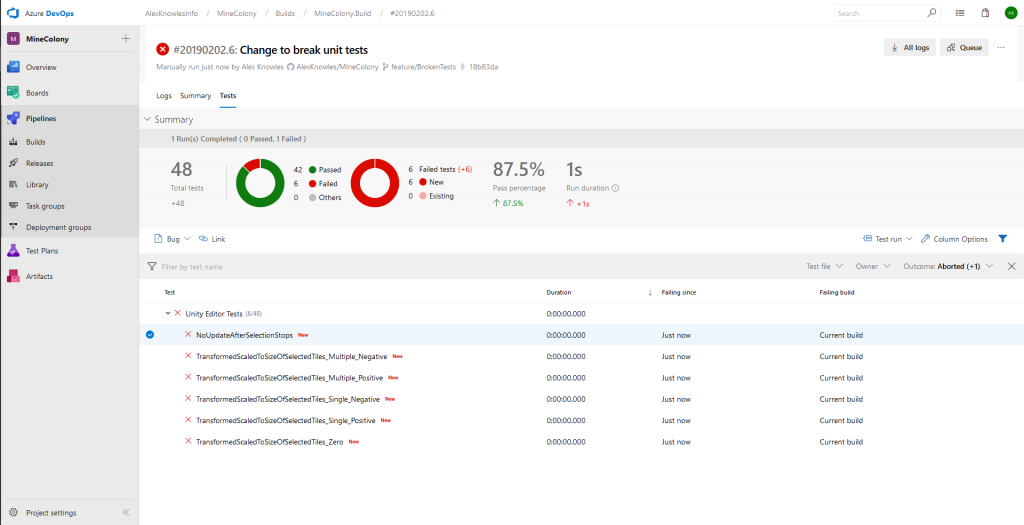
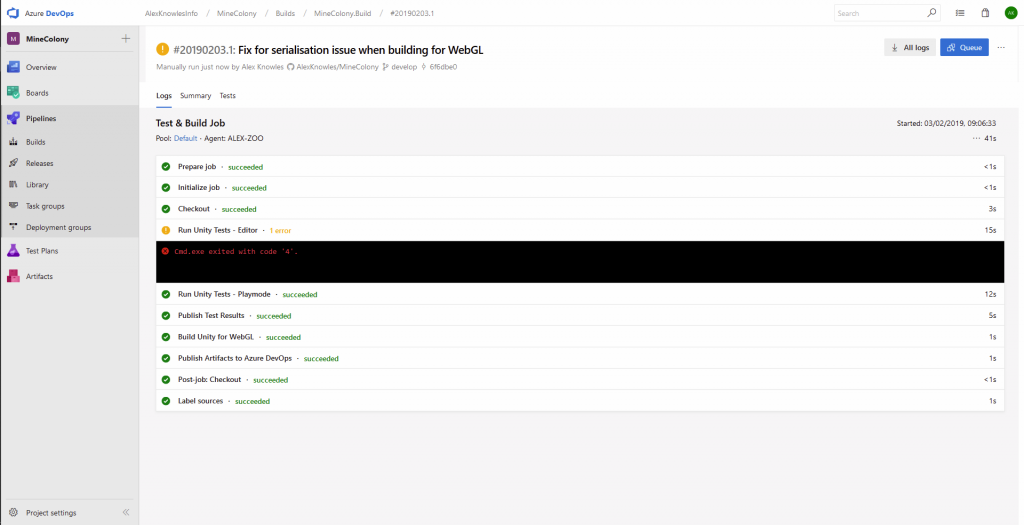
Running the build worked “successfully” but I get an “exited with code ‘4’.” error, which I assume is due to the project not having any editor tests. I also ran the build against my branch with broken tests and it reports broken tests as expected

Now, finally, for the main event. We will setup the actual build of the project to WebGL.
I found that you can’t simply give the project to Unity via the command line and expect it to build. Instead you need to create a script file in the project and specify another command line parameter -executeMethod. I’ve written a script and pushed it to the repo (can be found here). I won’t go into too much detail about how the script works as it’s really basic and could be improved a lot. All I will say is it allows us to add a new command line argument for specifying the output location of the build.
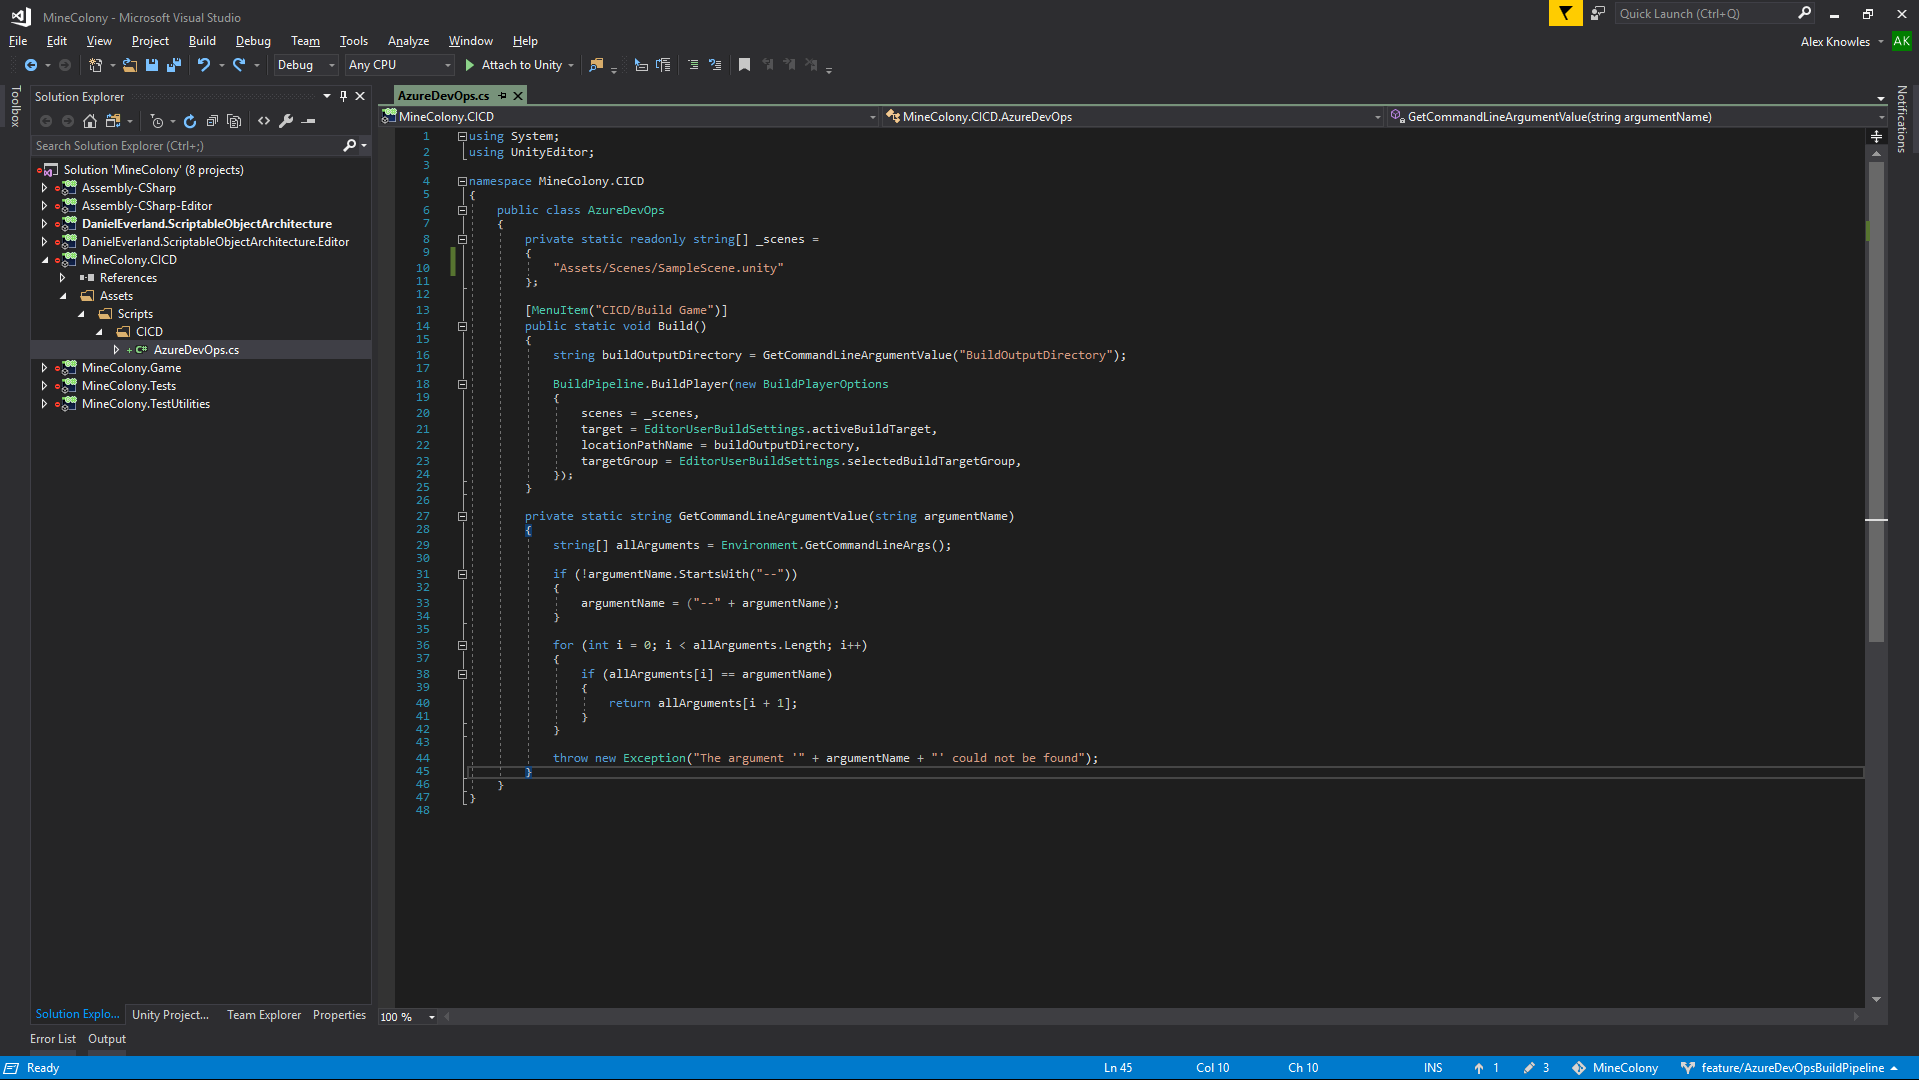
With this method and class created, we can now create the command to build the project and put it in the task.
start /WAIT Unity.exe -batchmode -quit -projectPath "$(Build.Repository.LocalPath)" -buildTarget WebGL -executeMethod MineColony.CICD.AzureDevOps.Build --BuildOutputDirectory "$(Build.ArtifactStagingDirectory)\Build"This command is very similar to the command created for the tests except we’ve added:
- -quit
- This closes Unity once the build has completed (or else it would never end!)
- -buildTarget WebGL
- Tell the build that we want a WebGL build
- -executeMethod MineColony.CICD.AzureDevOps.Build
- This calls the method to build the project. You have the specify the full namespace (if you’ve added one) and the class name
- –BuildOutputDirectory “$(Build.ArtifactStagingDirectory)\Build”
- As mentioned earlier, this is a custom argument picked up by the method we wrote to build the project. To keep all the WebGL parts together, I’ve opted to put them in a folder called “Build” inside the drop pickup location

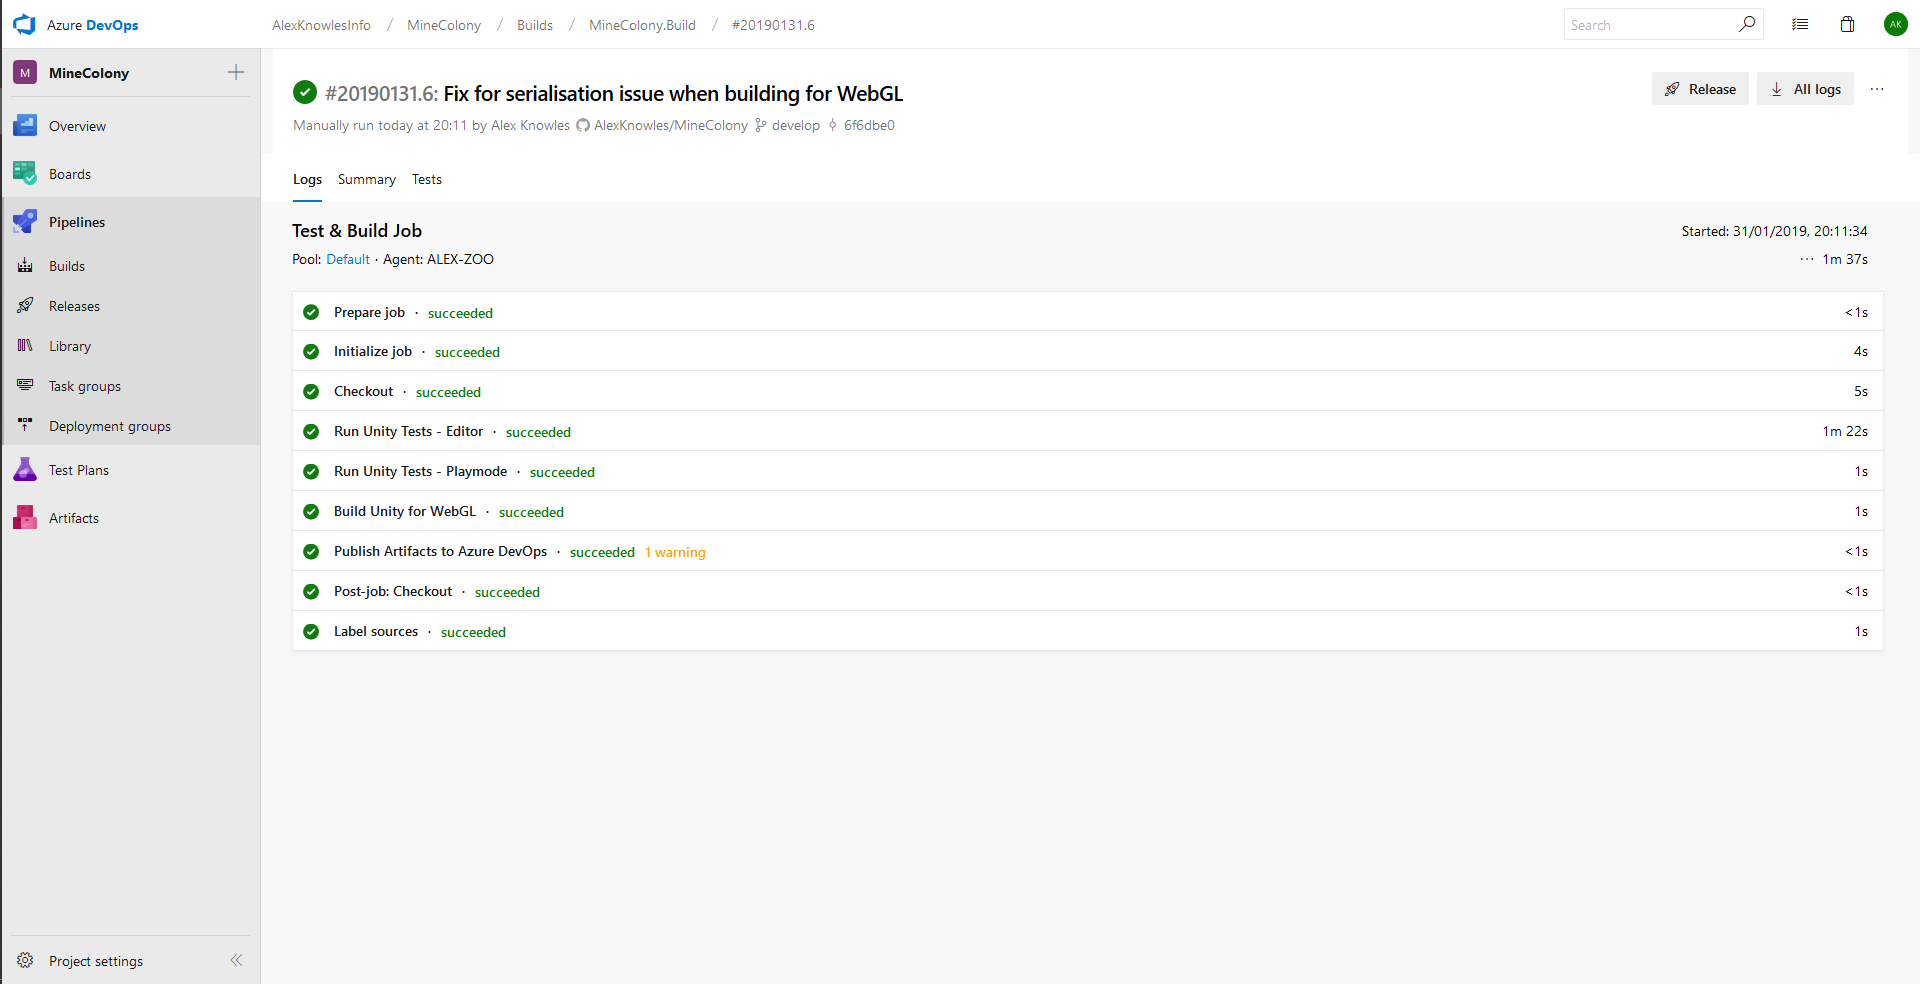
Now to run the pipeline and view the drop.
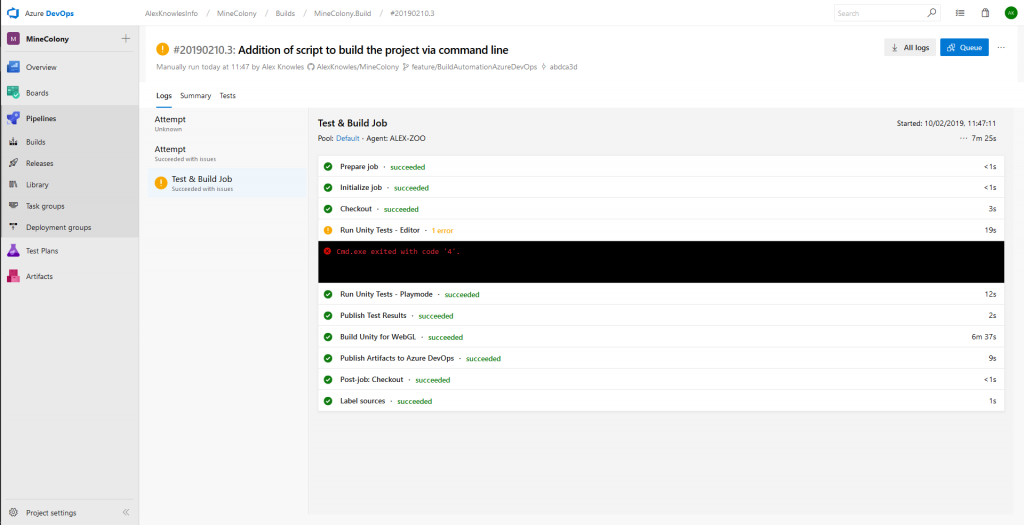
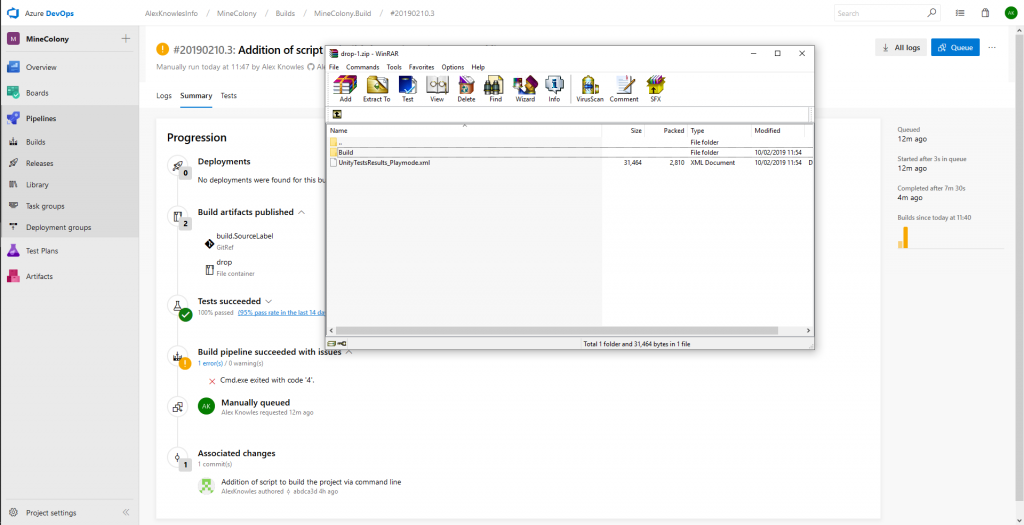
And that’s it for the build pipeline!
Configuring the Release Pipeline
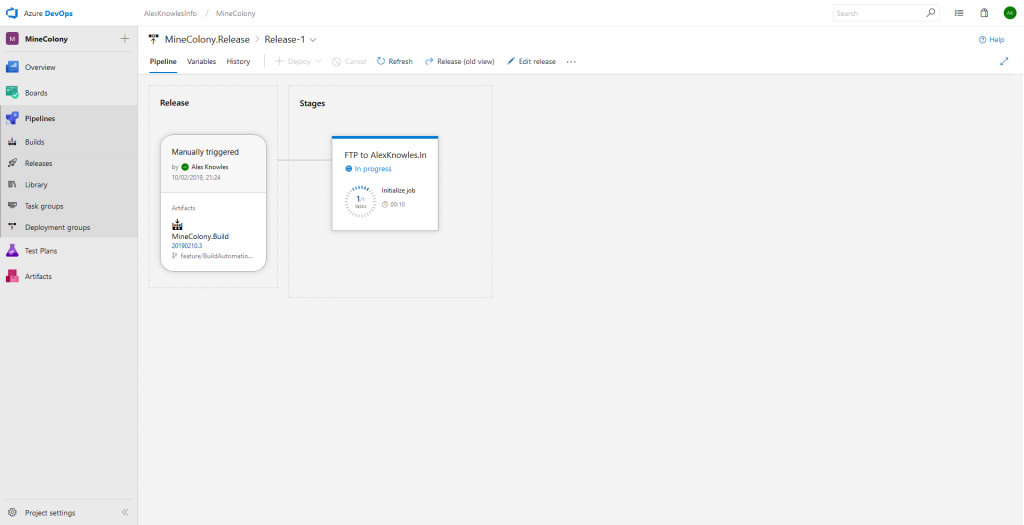
I’ve started off by creating an empty release pipeline, naming it “MineColony.Release” and set it’s artifacts to be the MineColony.Build. This will give us everything dropped from the build.
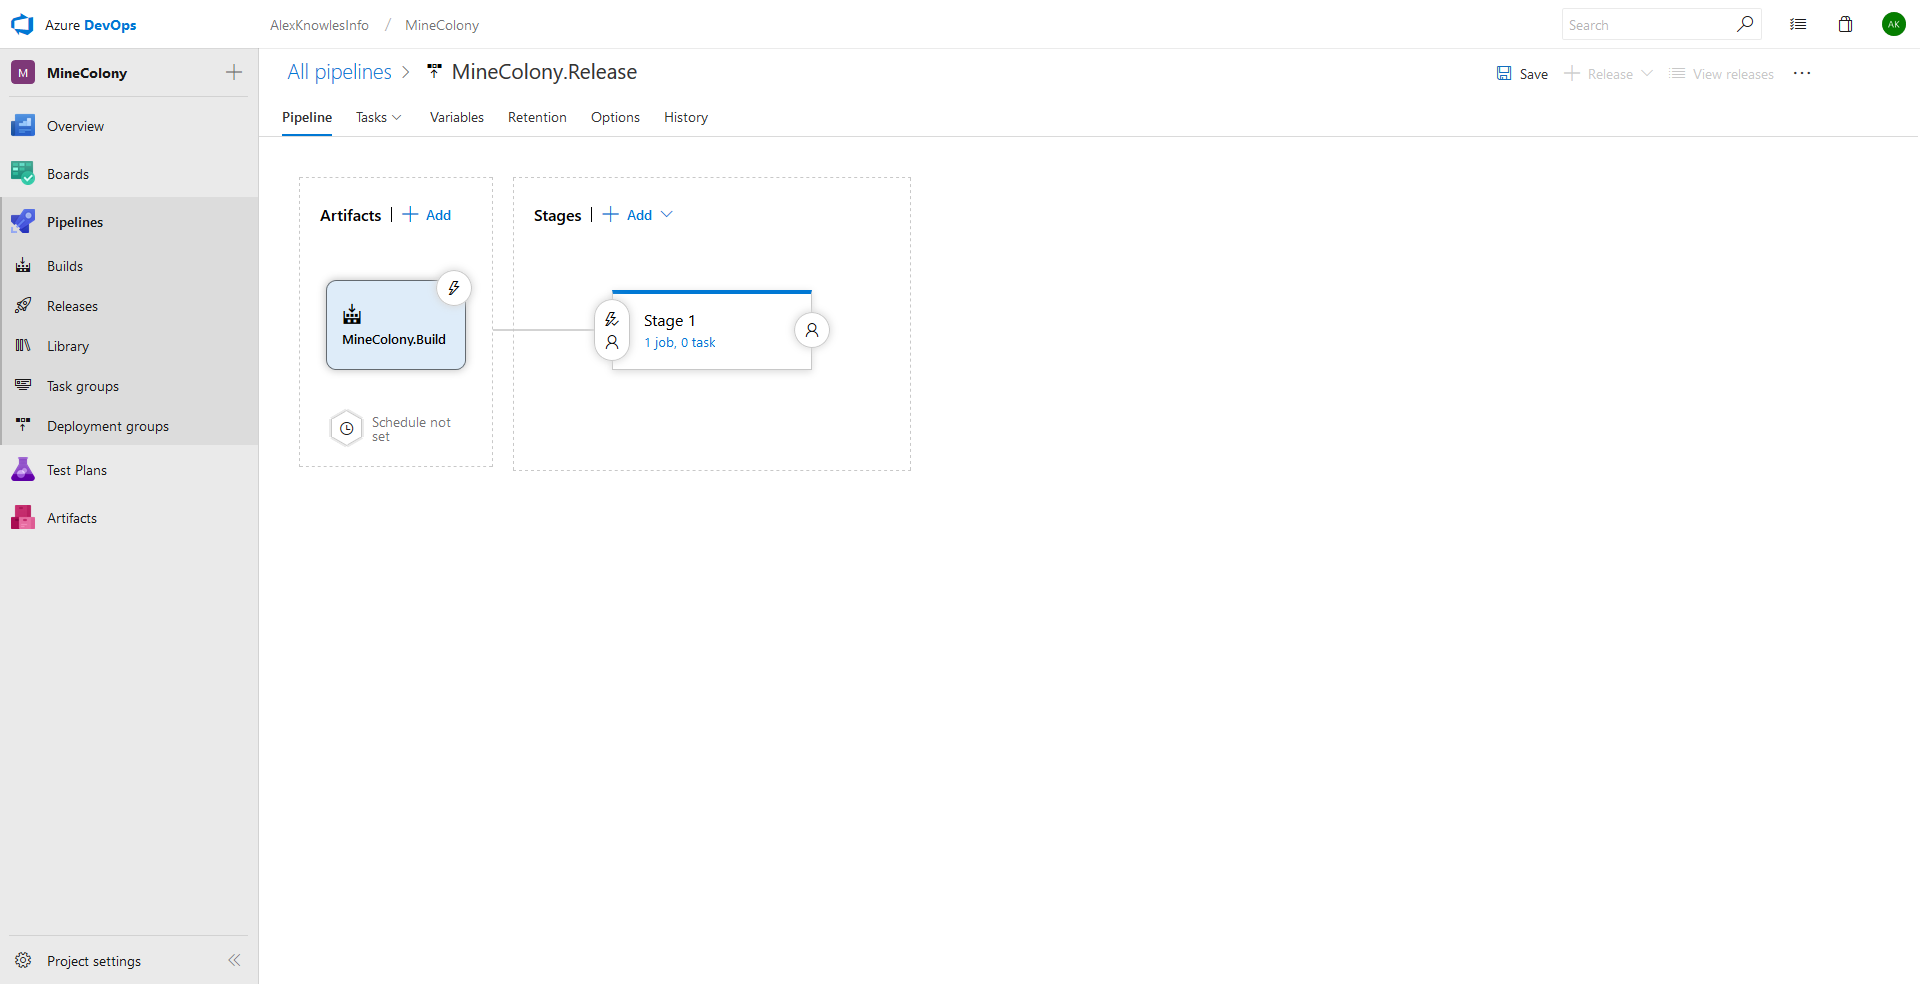
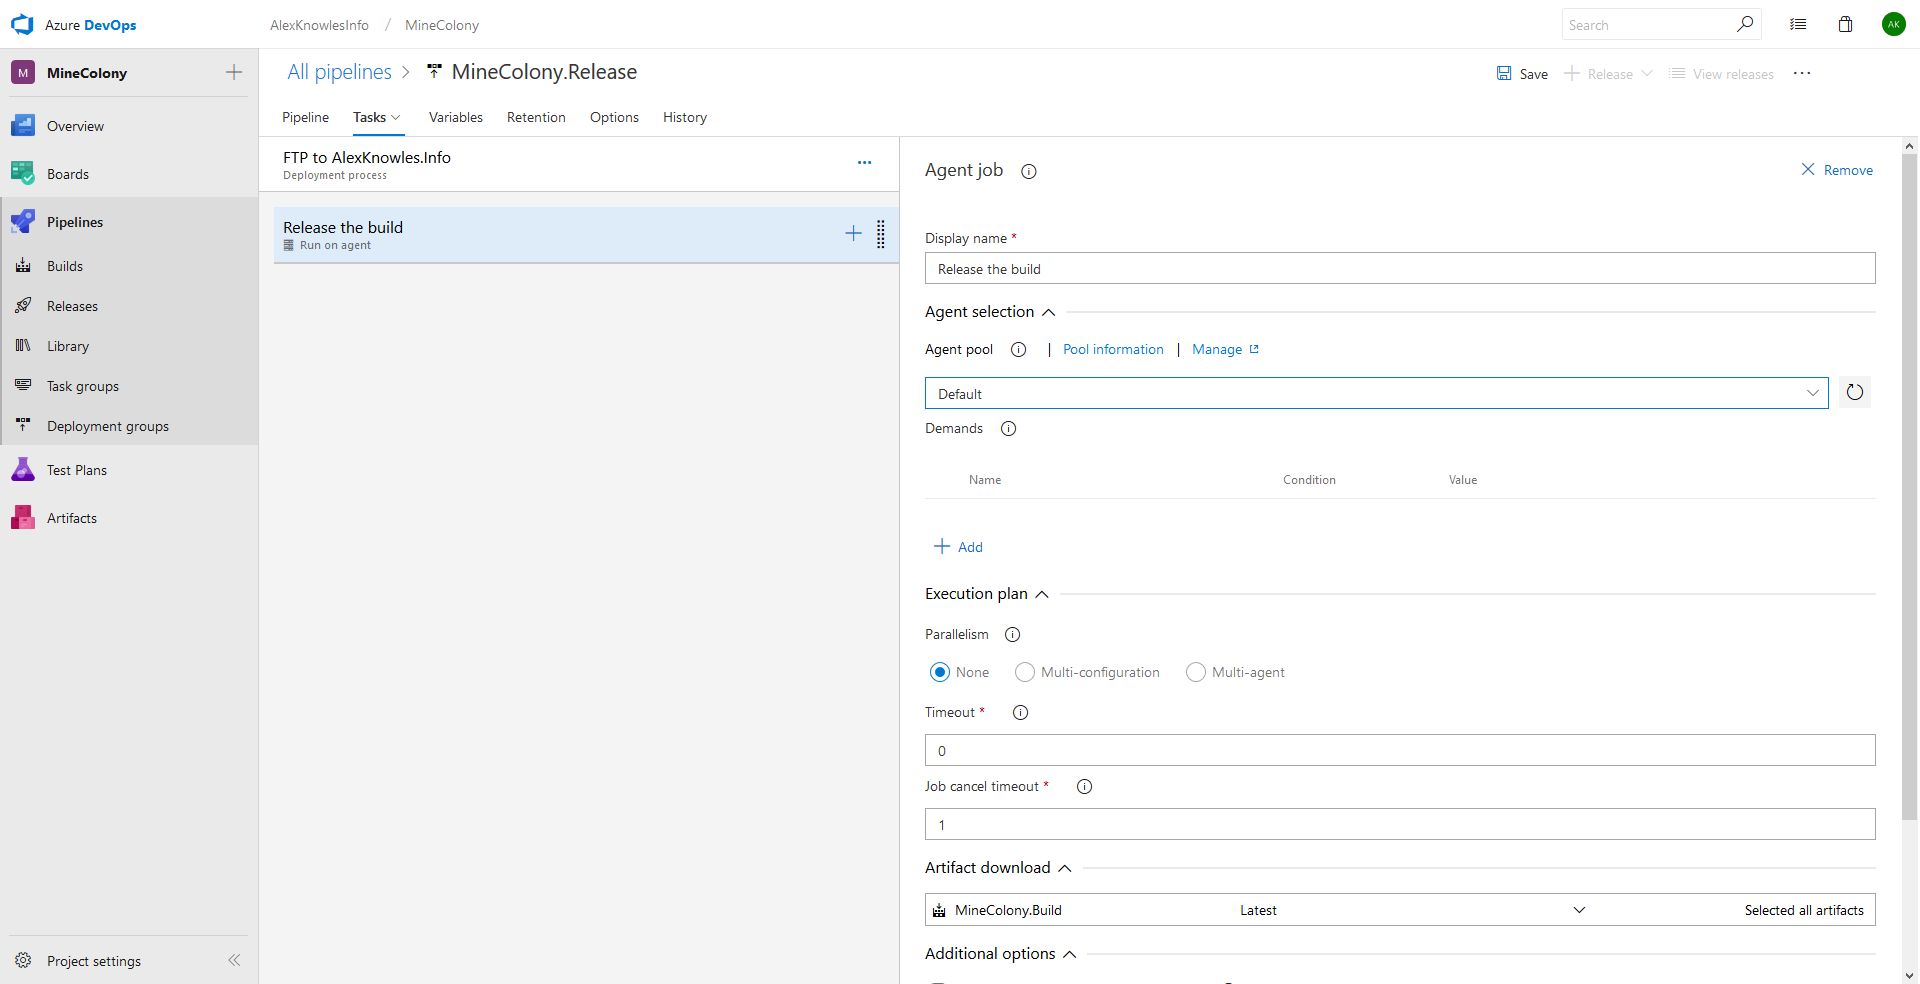
I’m only planning to FTP the files up to my website so we don’t need more than one stage. I’ve renamed the stage “FTP to AlexKnowles.Info”, set the Agent Job to use our self-hosted agent and renamed it to “Release the build”
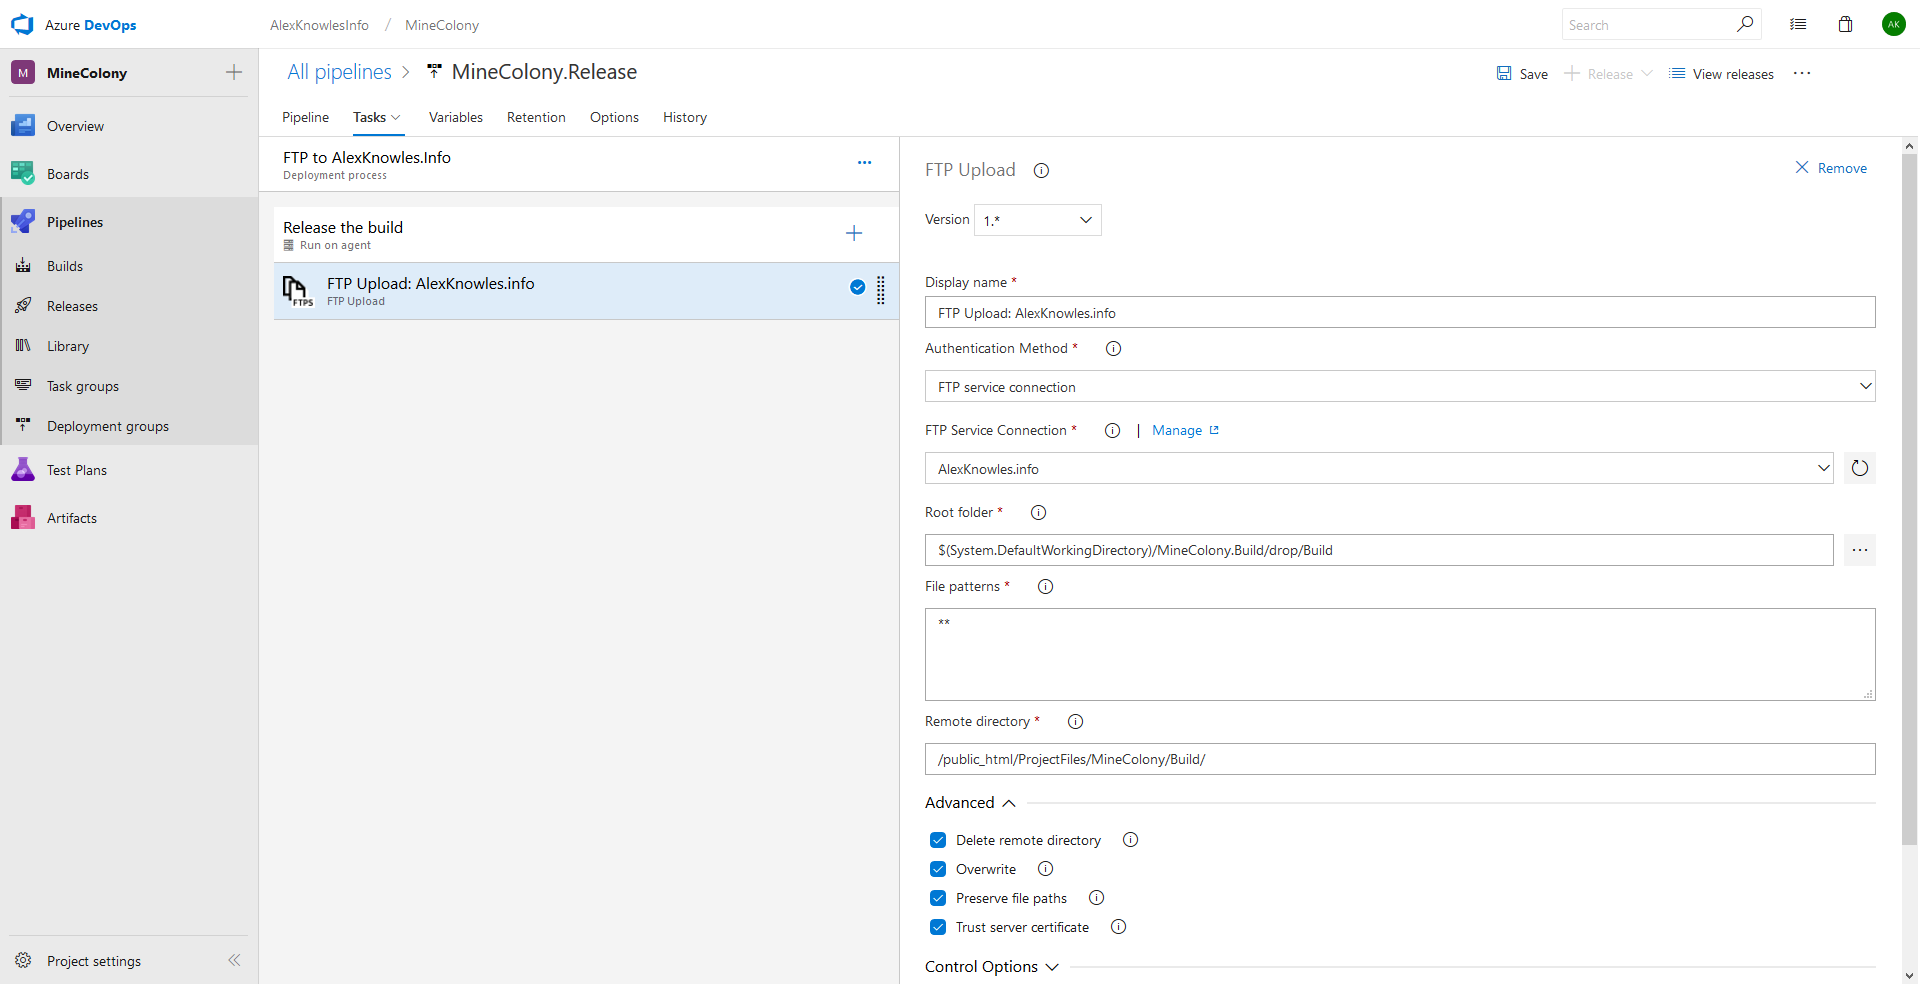
Next, and kind of finally, we need to add and configure an FTP task. I’ve already setup and plugged in an FTP Service Connection. We then want our root folder to be where we dropped the build to and our remote directory to be a location the website can get the files. I’ve also switched on “Delete remote directory” so we don’t get any weird stuff happing with old builds.
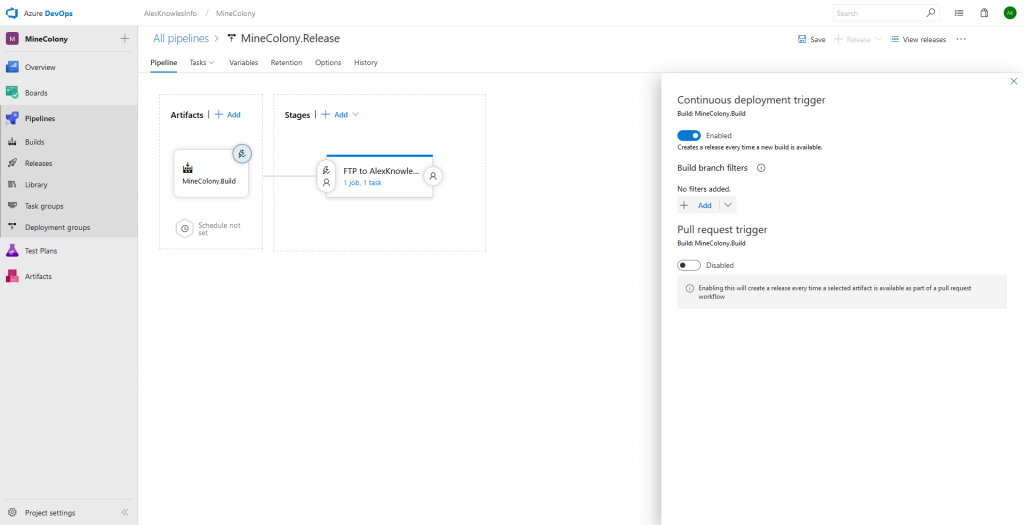
One last thing before we test it, turning on the CD trigger when a build is successfully complete.
Annnd just when everything looks peachy and all configured, the latest build didn’t include any textures or shaders… oh bother.
From running the command line locally against the build agents’ source (but loading Unity’s UI) I can see the scene is exactly the same as the build and there’s a fair few warnings.
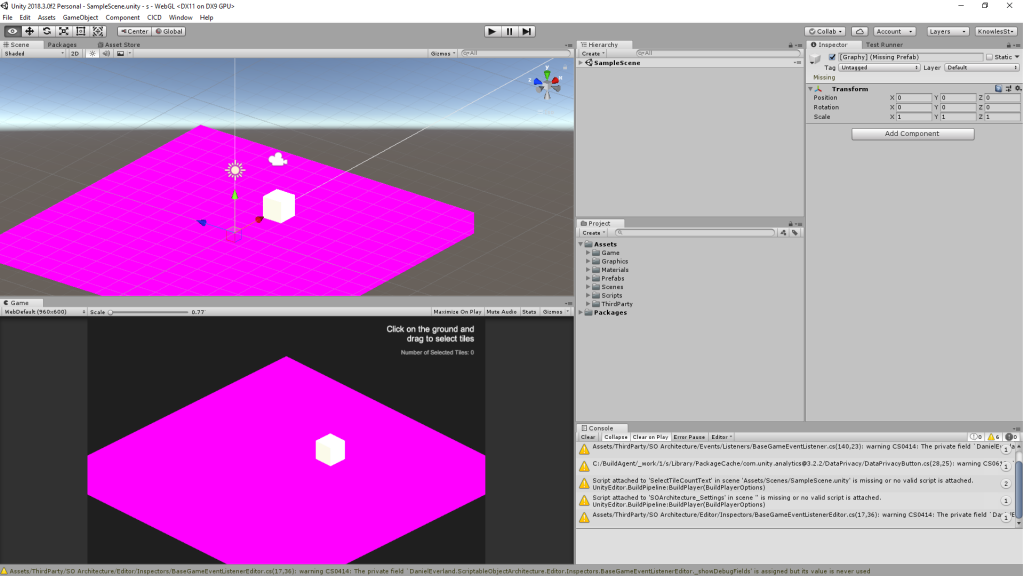
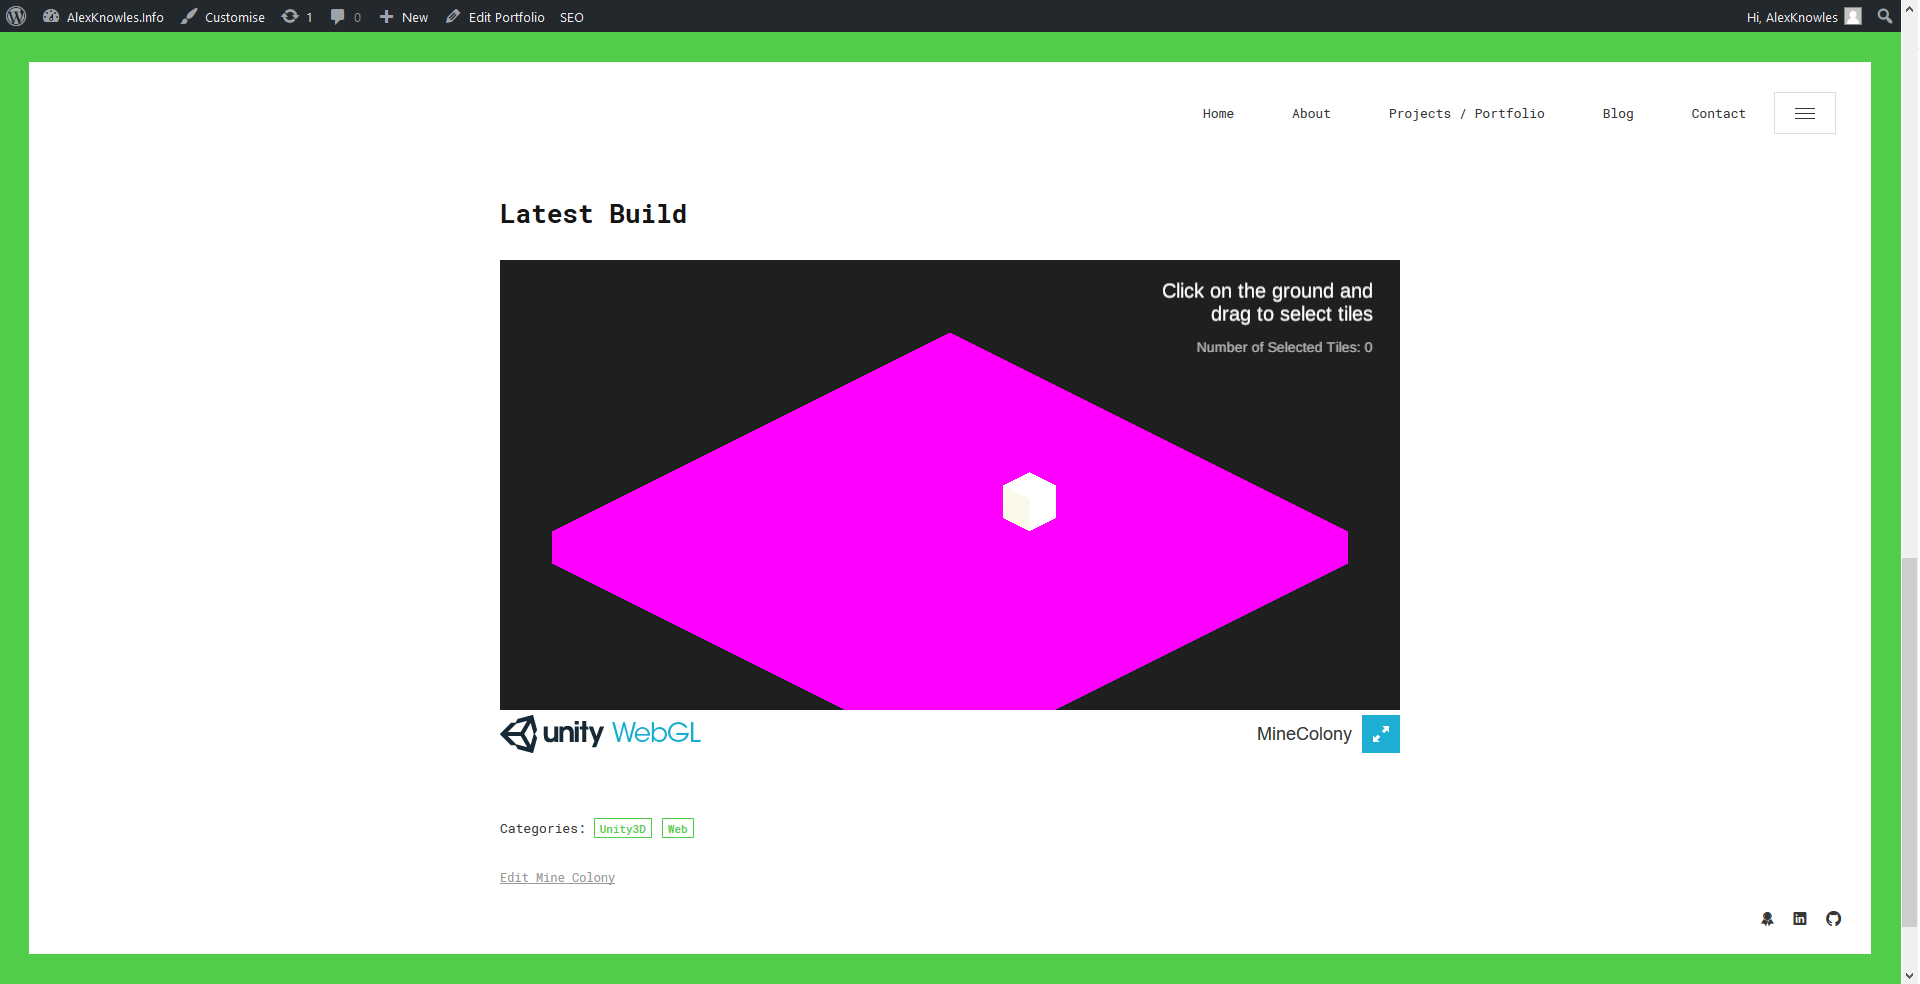
So this turned out to be nothing to with the build or the release but was instead caused by my .gitingore ignoring .meta files which Unity uses to store data about scenes and stuff. Lovely. I still seem to missing the text on frame rate counter but that’s nothing to worry about!

And that’s it! We now have a build and release pipeline for a Unity3D project.
Thank you for making it this far and if you would like to check out the final output, it can be found here.